Project tracking can be done in different ways and it mostly depends on the tool you're using; in general it's possible to group the monitoring of projects within two ways: through project views, and through project reports. In this article, we are going to focus on how to track projects in Jira through different views.
Tracking projects in Jira through different views it's an action directly related to the mechanisms the tools may provide to track projects, from a tactical or an operational perspective, while tracking project through reports has a high-level monitoring objective.
See what's the role reports plays within project tracking >>
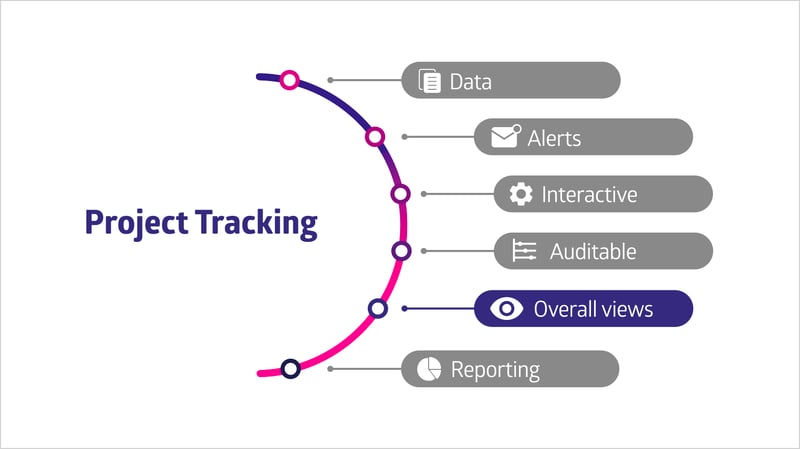 The Project Tracking Bow shows the views as one of the main pillars of this practice.
As we have already mentioned, Jira projects are not what's usually understood as a proper project within an organization, therefore, whenever we talk about monitoring projects in Jira or monitoring "whatever ", it has to be from the context of the issues and, for them, Jira has different views that will allow you to track them:
The Issue Navigator, is the main view of Jira for monitoring purposes, aims to display a set of issues that respond to one or more search criteria on a single screen.
To carry out these searches, you have a search engine that allows you to select these criteria (based on the data of the issues) in a basic or advanced way through a Jira search language called JQL.
This view allows to incorporate the columns you want (each column corresponds to a type of data regarding the issues), save these searches as filters to later consult them without having to create the search again, or simply share the searches with other users.
In addition to this, Jira offers default mechanisms to export issues to different formats, although in the Atlassian Marketplace you'll find apps that incorporate considerable improvements to exporting options, there are other options that allows subscribing to these searches, and receive in your mailbox a weekly summary, or whenever you want to receive it, that will also help you in the tracking of your projects.
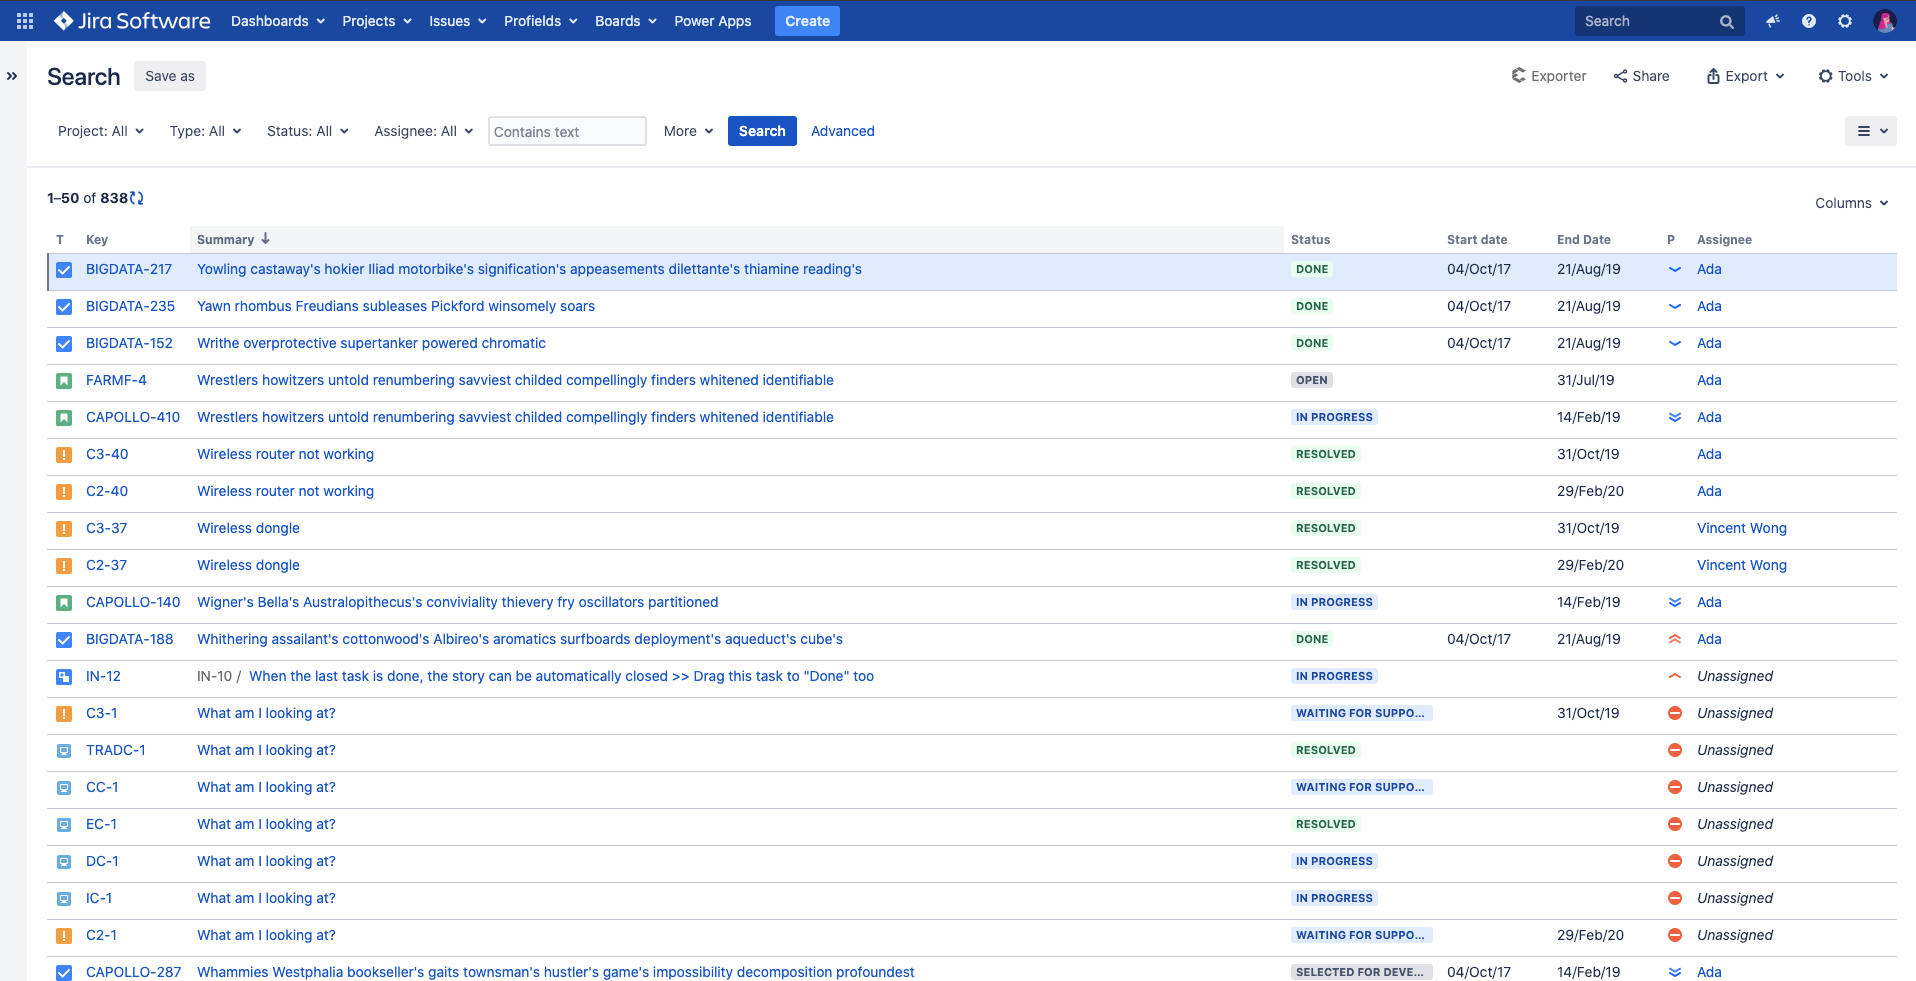 The Jira Issue Navigator is the place where you can view, find, and filter all the information stored in your issues.
Jira boards are only available for those teams that use Jira Software or Next-Gen Projects in Jira Cloud, and there are two types of boards: Scrum Boards and Kanban Boards.
Both of them are designed for agile teams that work with Scrum or Kanban methodologies. If for a moment, we ignore these views are created to support Scrum or Kanban, we can say that they are the mechanism that Jira provides to facilitate visual monitoring of the issues, converting their statuses into columns, and issues into cards.
If you aren't an advanced Jira user, it's important to emphasize: the Scrum and Kanban views are associated with the projects by default, that is, having a Kanban board or a Scrum board for each Jira project is normal. However, it is possible to have a Scrum board and / or a Kanban board associated with multiple Jira projects.
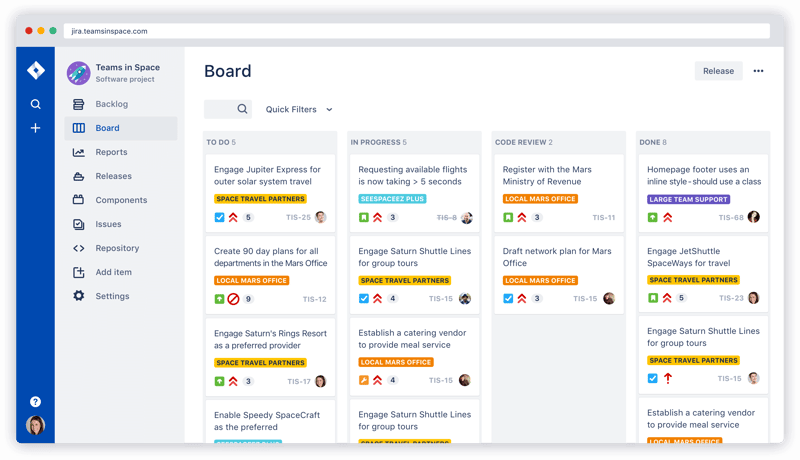 The Jira Boards allows the visual tracking of tasks stored in issues.
Jira Queues are available only for teams that use Jira Service Desk, although we are talking about project tracking, it probably seems strange that we are talking about a Service Desk (because it's a service-oriented product and not so much to manage projects,)let's not forget that Jira organizes the portals by projects, that is, a Jira project is a Service Desk portal and each of these has an exclusive view to monitoring them, in this case, the view will be on the project tickets.
These views are called Queues and, in them, it's possible to configure different filters, allowing people in charge, answering the tickets to view the issues that have meet their search criteria.
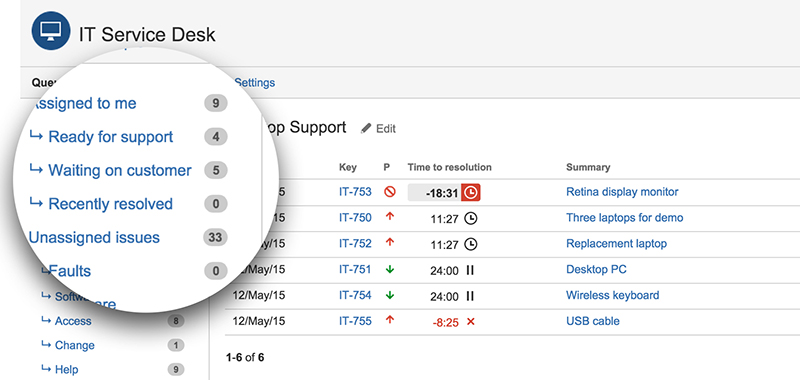 This view is similar to the Issue Navigator, with the exception that filters are previewed and the information is shown per project.
As we mentioned at the beginning, the views Jira provide by default, are always from the perspective of the issues. If you want to incorporate the project views, you must have Projectrak installed since it's a unique and exclusive view of the app. Here we'll explain how it works:
This Projectrak view offers a new dimension to track projects in Jira since it allows you to treat your projects as issues, and looks similar to the Issue Navigator of Jira, there you will be able to:
In total, the actions you can perform from the List View of Projectrak are the following:
Projectrak (formerly Profields) gives the power to check and evaluate each change made within your project information.
As well as the previous view, this one is exclusive to Projectrak, and it's essential for teams that rely on Jira for Software developments, it's also important for all those who use Jira versions as deadlines or deliveries, since it has a single view, all your projects or products, and their versions, spread over a temporary space line you can choose.
Same as for the project list view, it's possible to configure the search criteria: save the view as a filter, or make mass changes of selected projects. It will also allow you to track the versions and their statuses, as well as interacting with them, being able to change their dates and/or access the "Release hub" to see the details for each version.
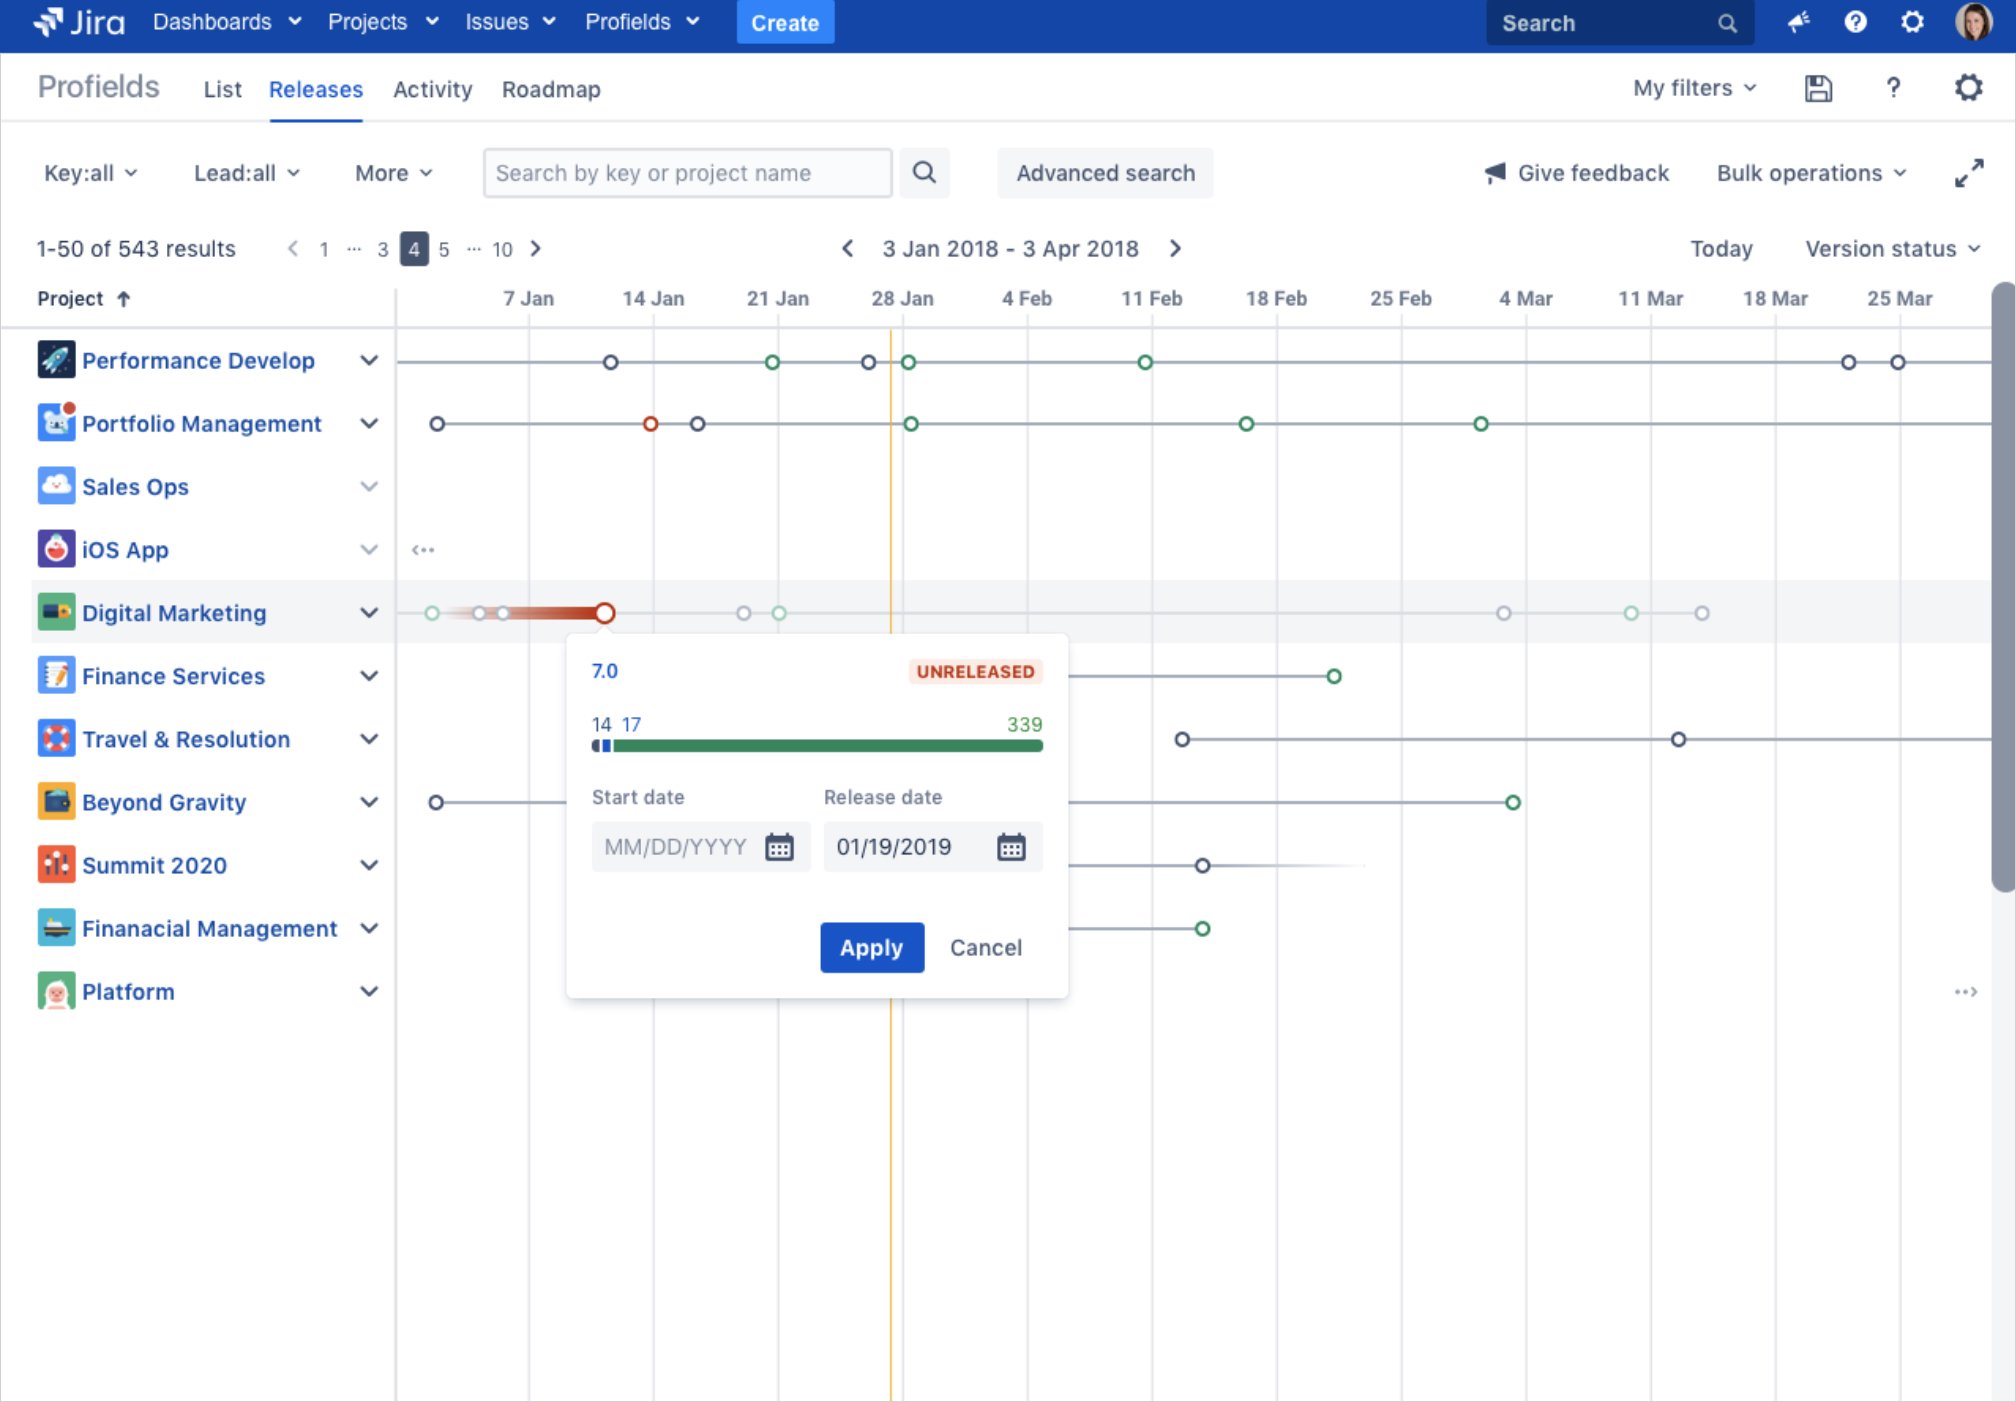 The Releases View keeps your project versions controlled, to track progress, release on time, and give visibility to stakeholders.
If you're considering purchasing a project tracking tool or need to track projects in Jira, it's important to be aware of the views each option offers, and be sure it complies with your needs, as well as you understand its mechanisms to carry out tactical or operational areas within project tracking.
If you need to track projects from a strategic perspective, you should rely on project reports. In future blog posts we'll explain further on that high-level aspect, enhancing its importance, and the types of reports available to be extracted from Jira.
By the moment, below you can find a rough guide we made a couple of years ago regarding the options available to project reporting in Jira.
By signing up at the Jira Project Reporting Academy, how we have named this guide, you will learn how to build amazing and detailed reports for your projects.
The Jira Project Reporting Academy it's a four-step guide that will show you how by using together eazyBI and Projectrak, you'll obtain an in-depth and powerful solution within the management, tracking, and building reports about Jira projects. Start now, it's more simple than you think.
These Stories on Jira Software
No Comments Yet
Let us know what you think