One of the main goals of Atlassian is to provide team collaboration software within an organization; this time, we'll show how to break down communication barriers between the Development and Support teams by simply connecting Jira Service Management Cloud and Jira Software Cloud, using Automation for Jira. No code is required, and you just will use the tools Jira Cloud offers natively.
When we refer to barriers, we talk about the lack of interactions between the teams working at the helpdesk and the development team on the same goal. Consequently, it generates a slow process of resolving incidents and requests, thus affecting the end-user.
Let's picture the following:
In this situation where both tools coexist, the synergies that can be obtained are not usually taken advantage of since the facilities provided by Atlassian to connect both worlds are very tangible and will allow us to achieve many benefits.
The solution we propose to this problem has a rather technical approach. We'll explain how by using Automation, it's possible to create bugs from the issue flow and resolve them once the bug is marked as resolved.
While both Atlassian software tools employ the same core of workflows, fields, and screens, each has a differentiating layer that makes them products with different purposes. Let's walk through these differences:
To show how it is possible to achieve the connection between these products, we present the following situation:
The support team has detected that a bug has caused an incident in one of our applications. This connection will allow the team to report and register the bug with a single click.
Subsequently, the bug will be added to the development team's backlog, which will be able to include it in the next sprint and fix it. Once fixed, the issue will be resolved automatically. This automation will be achieved with Automation for Jira and the flow automation tool provided by Jira Cloud without installing any additional apps.
First, let's create the bug. Let's edit our Incident flow and add a transition called, for instance, "Bug Detected." To do this, in our Service Management project, we’ll go to "Project settings," as you can see below: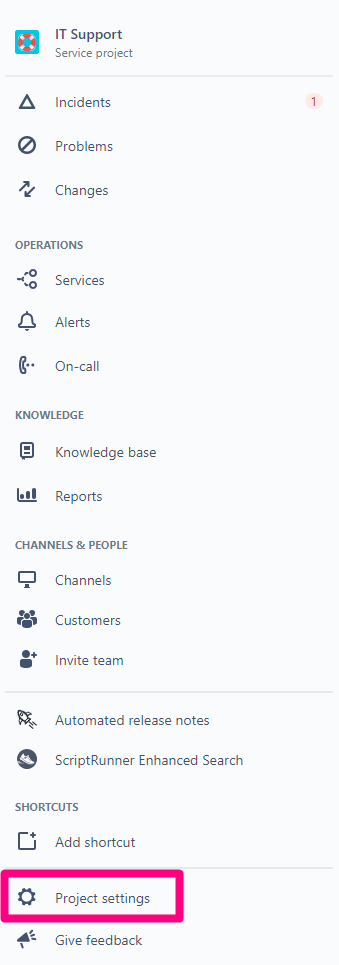
Once there, go to the "Workflows" section and look for the issue flow and edit it: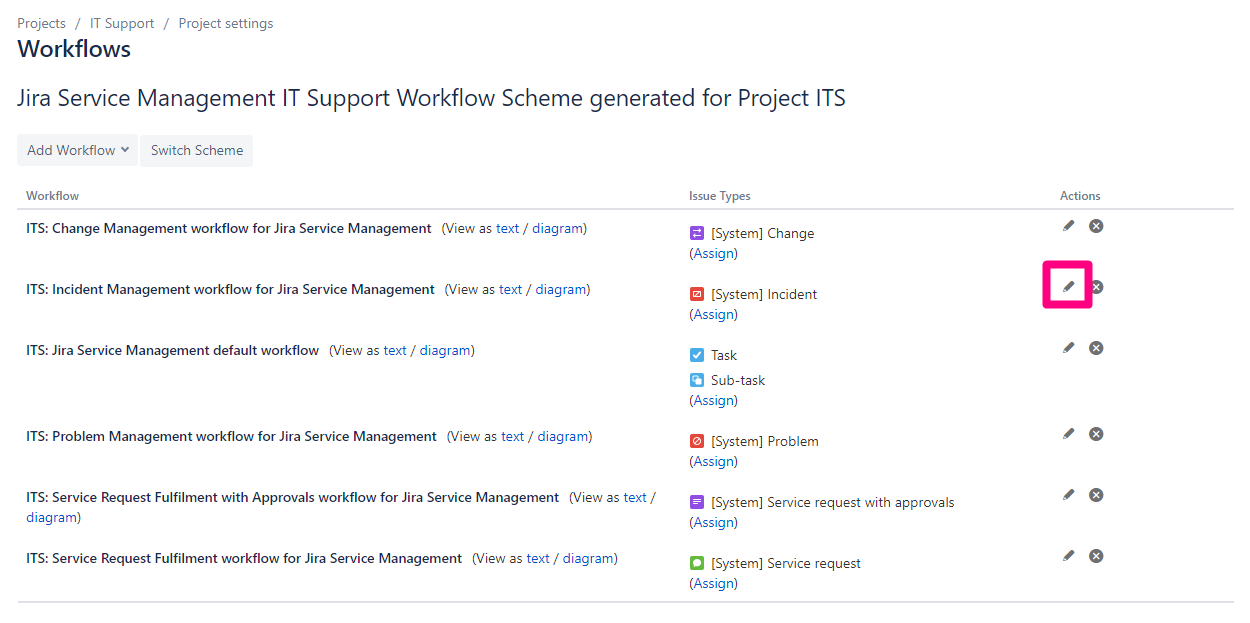
We'll add a new status called, for example, "Pending Bug." This will indicate to us that the issue with the reported Bug that is pending to be fixed, and its correction is released to solve it, we will click on the "+ Add status" button, located in the upper left part of the diagram of our flow, and we will write Pending Bug. In case our status does not already exist. There we will be able to see that new status is suggested in parentheses: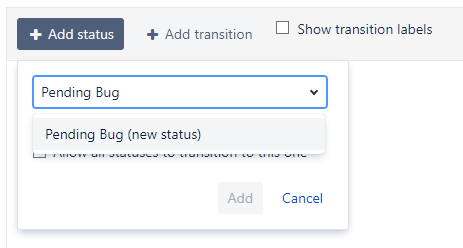
This box will allow us to add a description and a status category. In our case, we are going to add a short explanation of the status, and we are going to assign it the category "In Progress" to indicate that there is a team already working on it: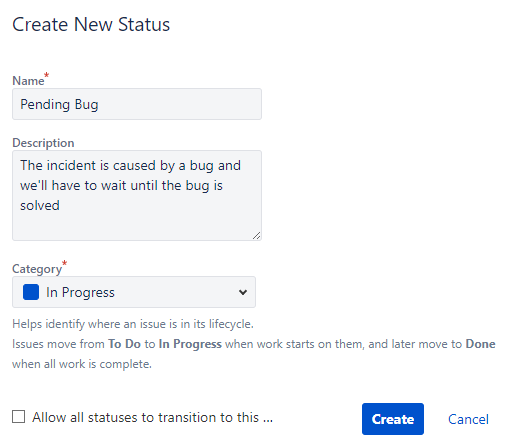
Next, we will create a new transition. We will click on the button "+ Add transition," or we can also draw an arrow from the status In Progress to our new status: Pending Bug. There, indicate the origin and the destination status, and then name it.
In this case, Bug Detected. Optionally give a description and indicate a transition screen. For the moment, won't be selected any screen: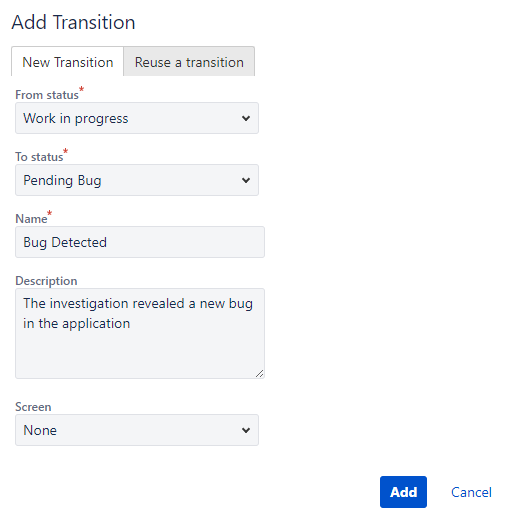
Next, we will create a transition from the status Pending Bug to Work in Progress which we will call "Bug Fixed."
Note: Since the bug has been resolved, we could create the transition directly to the "Resolved" status. However, it is better to give control over the resolution of the issue to the agents and thus allow them to verify the issue has indeed been resolved before the customer is notified.
Now we're going to publish the flow of the issue so that we can count on the new transitions in Automation. To do this, we will click on the "Publish Draft" button to confirm:
Now we'll create a transition screen where we will ensure, using a validator, that the faulty application has been indicated to us. To do this, click on the cogwheel icon at the top right of the screen and go to the Issues section: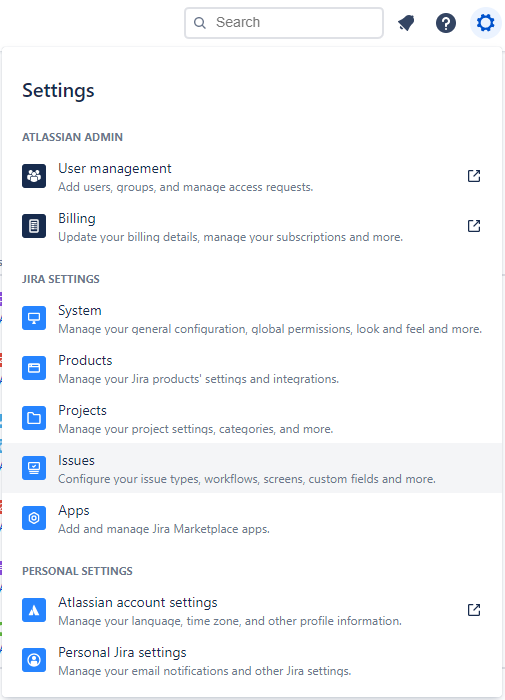
Once there, we move to the "Screens" section on the left and click on the "Add screen" button on the top right, just below the cogwheel icon. There we will give a name to our screen. In our case, we'll make it clear in the name that it's a transition screen: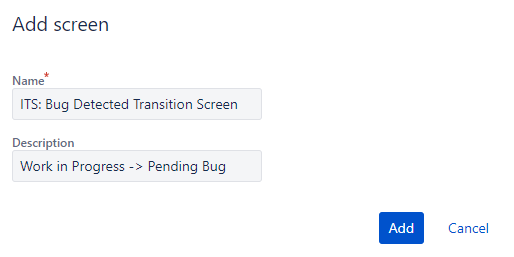
We'll add the "Application" field to our screen. In our case, this is a "Project Picker" type field since we have a software project in Jira for each application::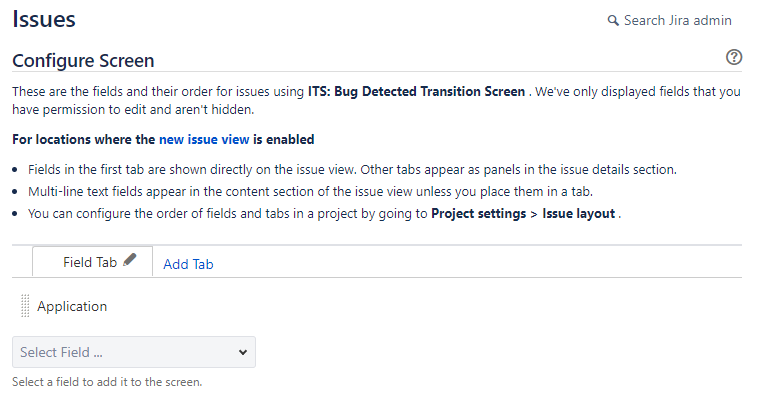
Once our screen is created, we will go back to edit our flow. We will select the Bug Detected transition and associate the screen to the transition: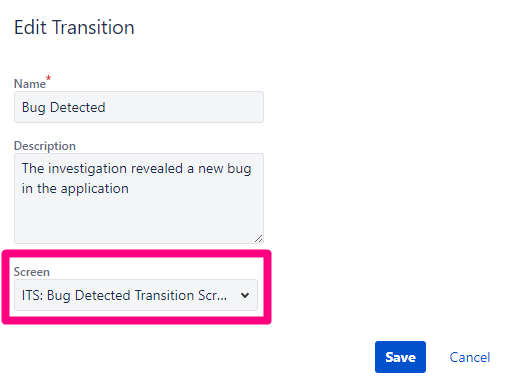
We'll also add a validator of type "Fields Required," indicating the transition's application field. In this way, we will make sure that we have been informed about the application that presents the bug at the time of transitioning to "Pending Bug":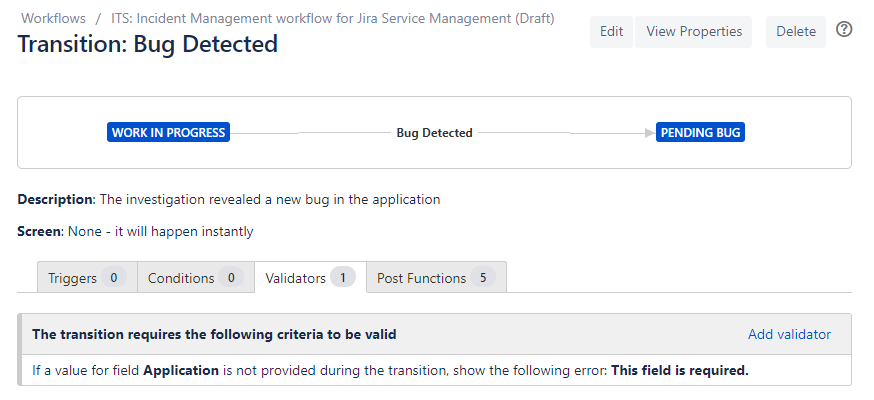
With all the above done, we can go to the Project Settings of our Jira Service Management project and go to the Automation for Jira section to create our rule that will generate the bug in the software project.
To create our rule, we'll click on "Add rule." In the automation rules, we will find three main elements: Triggers, Conditions, and Actions:
For our rule, we will select the Trigger Issue Transitioned, and we are going to indicate that it should be from the status Work in Progress to Pending Bug.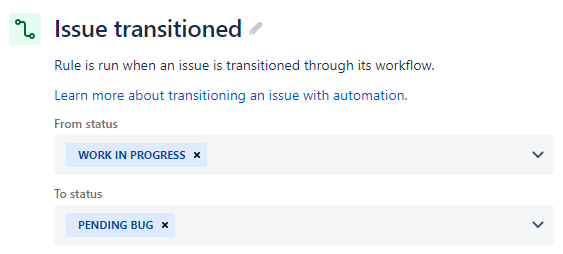
Now we will add a new component of type Condition and select "Issue fields condition" to assess the value of our field Application and determine if the bug is related to our software project.
We will select the field to evaluate, we will set our condition to equals because we want the project to be exactly that, and we will indicate the software project in value: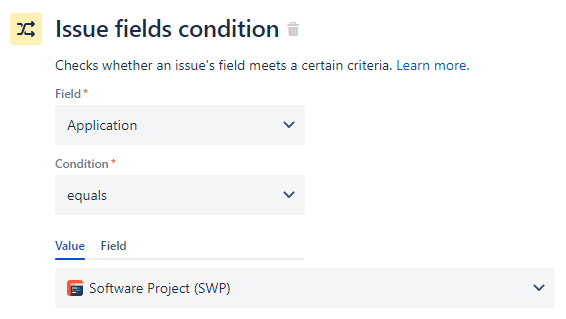
After the condition, we'll create another component of type Action that will create the bug in the software project. We'll select "Create issue" to do that. We must indicate the project in which the new issue is to be created, the type (Bug in our case), and the fields we want to report or copy.
In this example, we're going to set both "Summary" and "Description" to be copied, but you can select as many fields as you want and set them as you wish: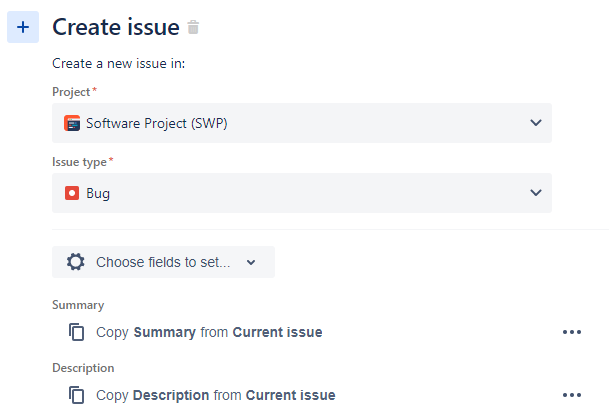
Finally, and for the sake of traceability, we will create a link between the issue and the new bug so that both the agents and the development team are aware that there is a relationship between those two. To do this, we will add a new component of type Action and select the type "Link issues". We will establish the type of link that we want to exist between both, and we will indicate that it must be created with the most recent issue created, which will be the bug that we have just created in the previous step: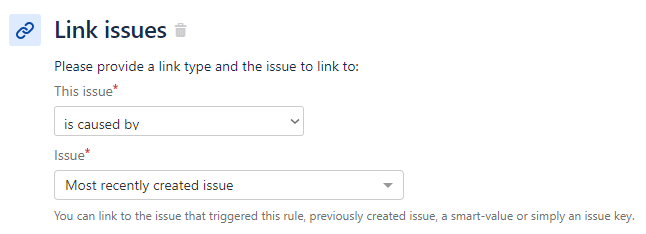
That's it! By saving this rule, we will have ready our automatism that will create a bug related to the issue when it transitions to Pending Bug: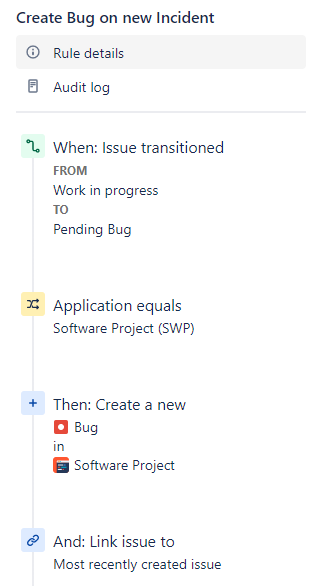
We must go to our software project and create a new Automation rule for when the bug is closed. To do so, you will have to use a new type of component that we have not explained before, Branch rule / Related issues, to transition the related issues, i.e., the incidence.
We encourage you to try it by yourselves, and we leave you here the resulting scheme:
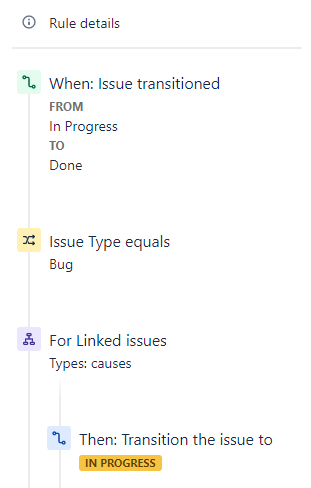
Making this connection requires little effort and is less complex since native elements are used without custom development.
As you can see, allowing our support and development teams to work together and align without overloading them with administrative management or manual procedures is possible. Both tools provide great value without requiring significant effort or extra dedication, so our teams will feel comfortable working with them, resulting in better service and product quality.
If you need further assistance implementing this or other solutions, do not hesitate to contact us, we can help you get the best out of your Atlassian tools without extras. Also, you can learn more about the power of Automation at an exceptional event we celebrated alongside Atlassian and Appfire:
Learn directly from the creators of Automation for Jira, Atlassian CLI, and Projectrak in an event like a few others.
Click the button below to watch a video in which representatives from Atlassian, Appfire, and DEISER demonstrate ways to automate large Jira instances. Find out the details by pressing the button below.
These Stories on Jira Software
No Comments Yet
Let us know what you think