

Having prioritization standards at a service desk or helpdesk it's decisive when it comes to boosting productivity. This process affects equally the customer and the team handling the ticket; that's why we'll explain how to create a prioritization matrix or priority matrix that allows taking quick and accurate decisions when receiving a ticket in Jira Service Management environment.
Jira Service Management (JSM) brings by default a system field called "Priority" that serves us perfectly to model this concept. It is usual to find the mistake of including this field in the input form of the user portal. The priority should not be left to the user's discretion or the agents; the priority should be established based on the initial establishment of objective criteria agreed by the team.
Here's where the prioritization matrix or priority matrix comes into play; in JSM, we don't have a way to implement the matrix for our cash flow incidents, for example. Let's go through this proposal to build a prioritization matrix for JSM. But first:
A prioritization matrix is a tool that enables an objective, consensual, and unambiguous way to determine and rank which main tasks the team shall invest their efforts in, in our case, applied to the Information Technology Services Management (ITSM) area, to deliver an effective service to customers.
Having a priority matrix defined, agents will not spend time nor effort determining which task to work with next; instead, they will tackle the next highest priority task in the work queue.
The most common approach for this prioritization matrix application is through a two-dimensional system illustrating the impact on one axis and the severity on another. Personally (and this criteria is debatable), the concept of urgency might be subjective; that's why I prefer to use the term severity.
Let's define these two concepts before we continue to establish our priority matrix:
Cons:
Now let's define the values of Impact and Severity; once determined, we'll have in this simple prioritization matrix we're building, and finally, it allows us to calculate the priority. Commonly these values are represented with numbers or with adjectives such as High, Medium, and Low.
It's advisable to use less corporate/technical language to avoid disruptions in the prioritization. Imagine if a person in charge who provides the information is a user unfamiliar with the terminology established. This is why our suggestion is the following:
| Impact | Severity |
|
|
This way, users will understand the request, and we'll be able to define our matrix by translating their responses to quantitative values. Let's define our priority matrix:
| Severity \ Impact | It only affects me | It affects one or more teams | It affects the entire company |
| I can work normally | Low | Low | Medium |
| I can work with difficulty | Low | Medium | High |
| I cannot work | Medium | High | Critical |
From now on, this model will help us to automatically prioritize our tickets! Consequently, We'll have ordered agent queues, it will be easier to estimate SLAs, create alerts, among other things.
How do we take this matrix into our Jira Service Management? To implement the prioritization matrix we've defined, we'll use tools JSM Cloud plans already have regarding custom fields and Automation.
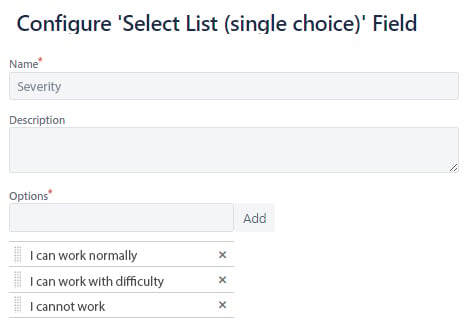
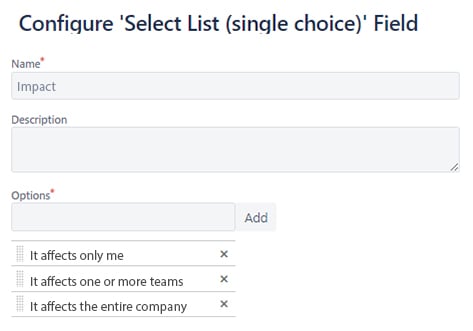
First, we need to create two custom fields to model the Severity and the Impact. These fields must be a Select type; there, we'll introduce the values as lists, those we've defined previously. Let's see how it will look in JSM:
In this screen, we'll define the values of the field Severity:
In this screen, we'll define the values of the field Impact:
Next, we'll add the fields for the ticket creation screens. Let's include them in the Request Types, so they correspond to our system incidents. In the Request Type, we change the copy to make the language more closer to the user, e.g.:
We also must make sure the Priority field is not in the creation or editing screens. It should only be displayed on the display screen since it will be a calculated value. In the situation of a manual reprioritization, we would be able to create a transition that allows us to control through a condition that only specific roles (e.g., the service desk coordinator) can manually reprioritize an incident and justify it.
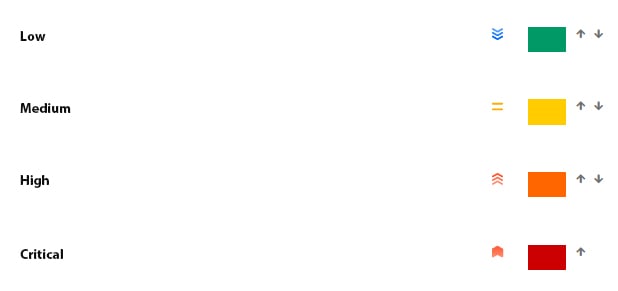
In the Jira attribute settings, we will configure the values of our priority matrix:
Now it's only left to implement the Priority calculation based on the Severity and Impact defined earlier. For this last step, we'll use Automation, with the following components:
Finally, let's create the rule: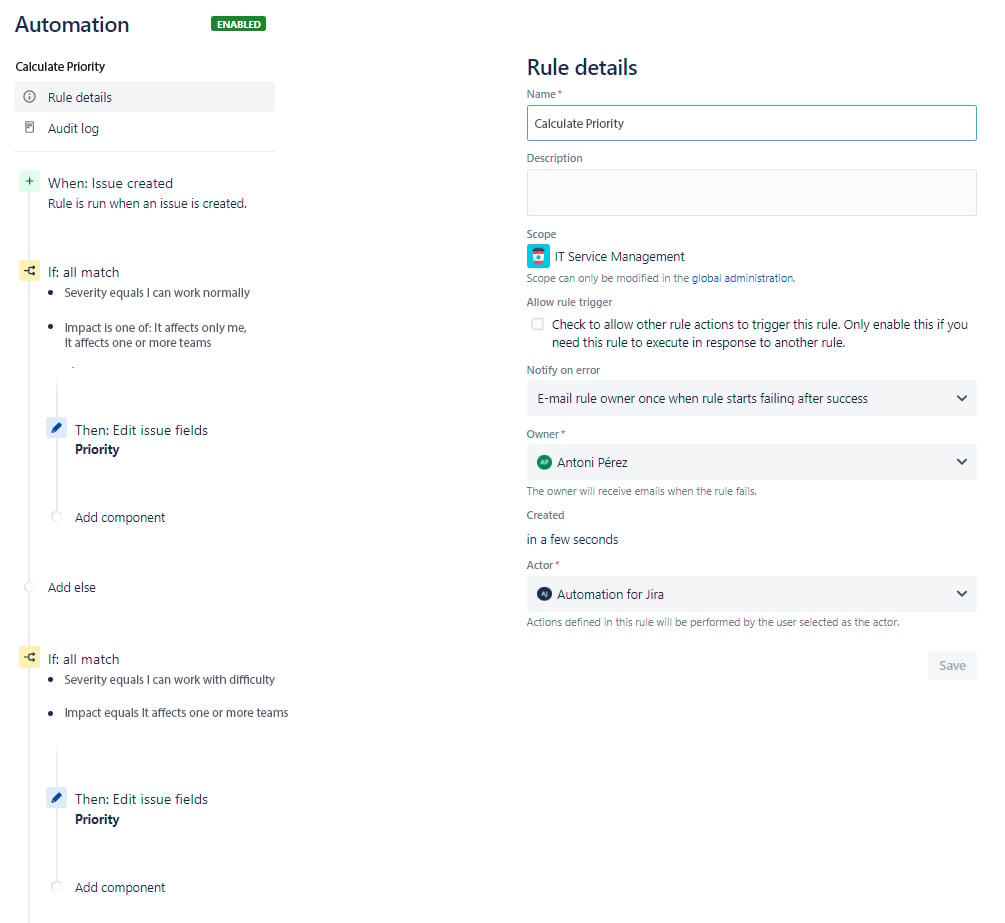
Learn how to automate tasks that react to project actions in Jira >>
This is one of the multiple approaches we can take. It's also possible to do it with JQL conditions, although it's a bit more complex. That's precisely one of the greatest attributes of Jira in general, there are different ways to achieve your goals, and we encourage you to discover new ways to calculate the priority matrix. If you have any comments, we would love to read them below.


Comments (2)