When running different projects, it's essential, for obvious reasons, to keep track of how much money has been spent across the whole project portfolio. This will help to identify its purpose, when, and where the investment has been made. This way, you'll ensure the projects are completed within the allocated budget, and if you're using Jira to work on your projects, we'll show you a solution that helps keep track of your project budgets in Jira.
A project budget is a plan that details how much will be spent, for what purposes, and by when. It is an essential document for project planning and management, as it helps ensure that the project is completed within the allocated budget.
A project budget must include all costs associated with the project, including labor costs, materials, equipment, facilities, services, and other expenses. Costs can be categorized as direct or indirect. Direct costs can be directly attributed to the project, such as labor and materials costs. Indirect costs, such as administrative and overhead costs, cannot be directly attributed to the project.
In order to start tracking a project budget, it's necessary to choose the right tool. In this case, we'll use Budgety. Budgety it's a simple and intuitive app that helps to manage project expenses without a hustle, and we're going to show you how, when, and where to work with it:
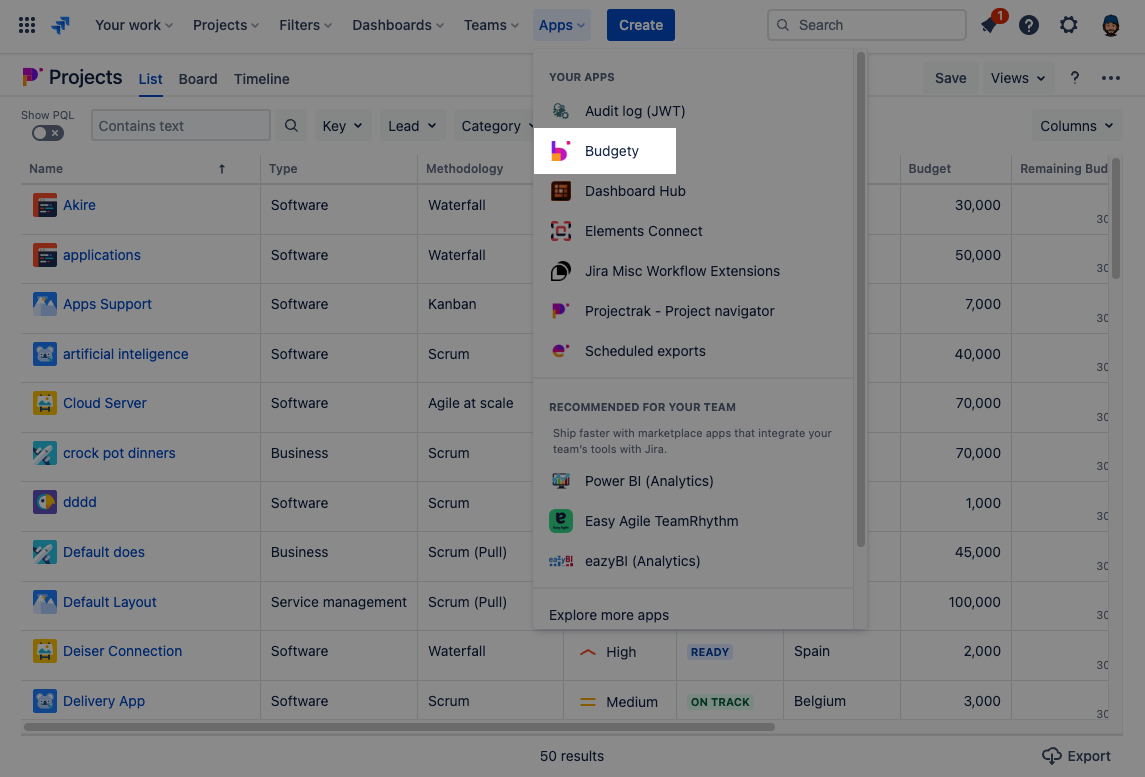
1. In the first place, you need to install the app from the Atlassian Marketplace. As soon as it's installed, Budgety will be available in the Jira apps menu:
Once installed, Budgety will appear in the Jira apps menu.
2. The first screen you'll see will be shown with many zeros, and the chart will be empty (as you haven’t introduced any information about project budgets yet). Don’t worry; this screen will be populated with information soon enough, as you can see in the following example. If we need to see information about our project’s budgets, we just need to select the "Add budget and costs” option:
 Click on the "Create budget" button to start tracking your project information.
3. Now, select the project you need to associate your budgets to and start tracking the financial information. In this screen, select the project from the drop-down, look for the project you want to link budgets and costs, or scroll down to find it. This project list will show all available projects in your Jira instance.

Select the project you need to assign the budget and cost.
4. Once selected the project to work with, now's possible to see the entire project page divided into three sections:

Cost details: Completing the fields and selecting “Add cost” will make Budgety run the precise calculations and automatically add the information provided in the last section and the results of those calculations as costs. You will always be able to return to the project’s page to check or report new costs.
Check your cost history to review your project's information.
If you need more detailed information, pass by our documentation, and remember, by tracking your budgets and costs with Budgety, you will have simple views for real-time insights on not only how your projects' budgets are holding up but also on the total budgeting for your Company. This will allow you to make informed decisions based on accurate and up-to-date financial information, monitor and control budget costs, and allowing to perform timely corrective actions to ensure better financial control of your projects.

As you can see, Budgety offers the opportunity to keep tight control of your financial information in Jira in a simple way.
To keep the app up and running, it's just necessary to input the direct and indirect costs linked to projects, and right after, you'll be ready to monitor in real time the impact on the allocated budgets across an entire project portfolio...
These Stories on Atlassian platform (cloud)
No Comments Yet
Let us know what you think